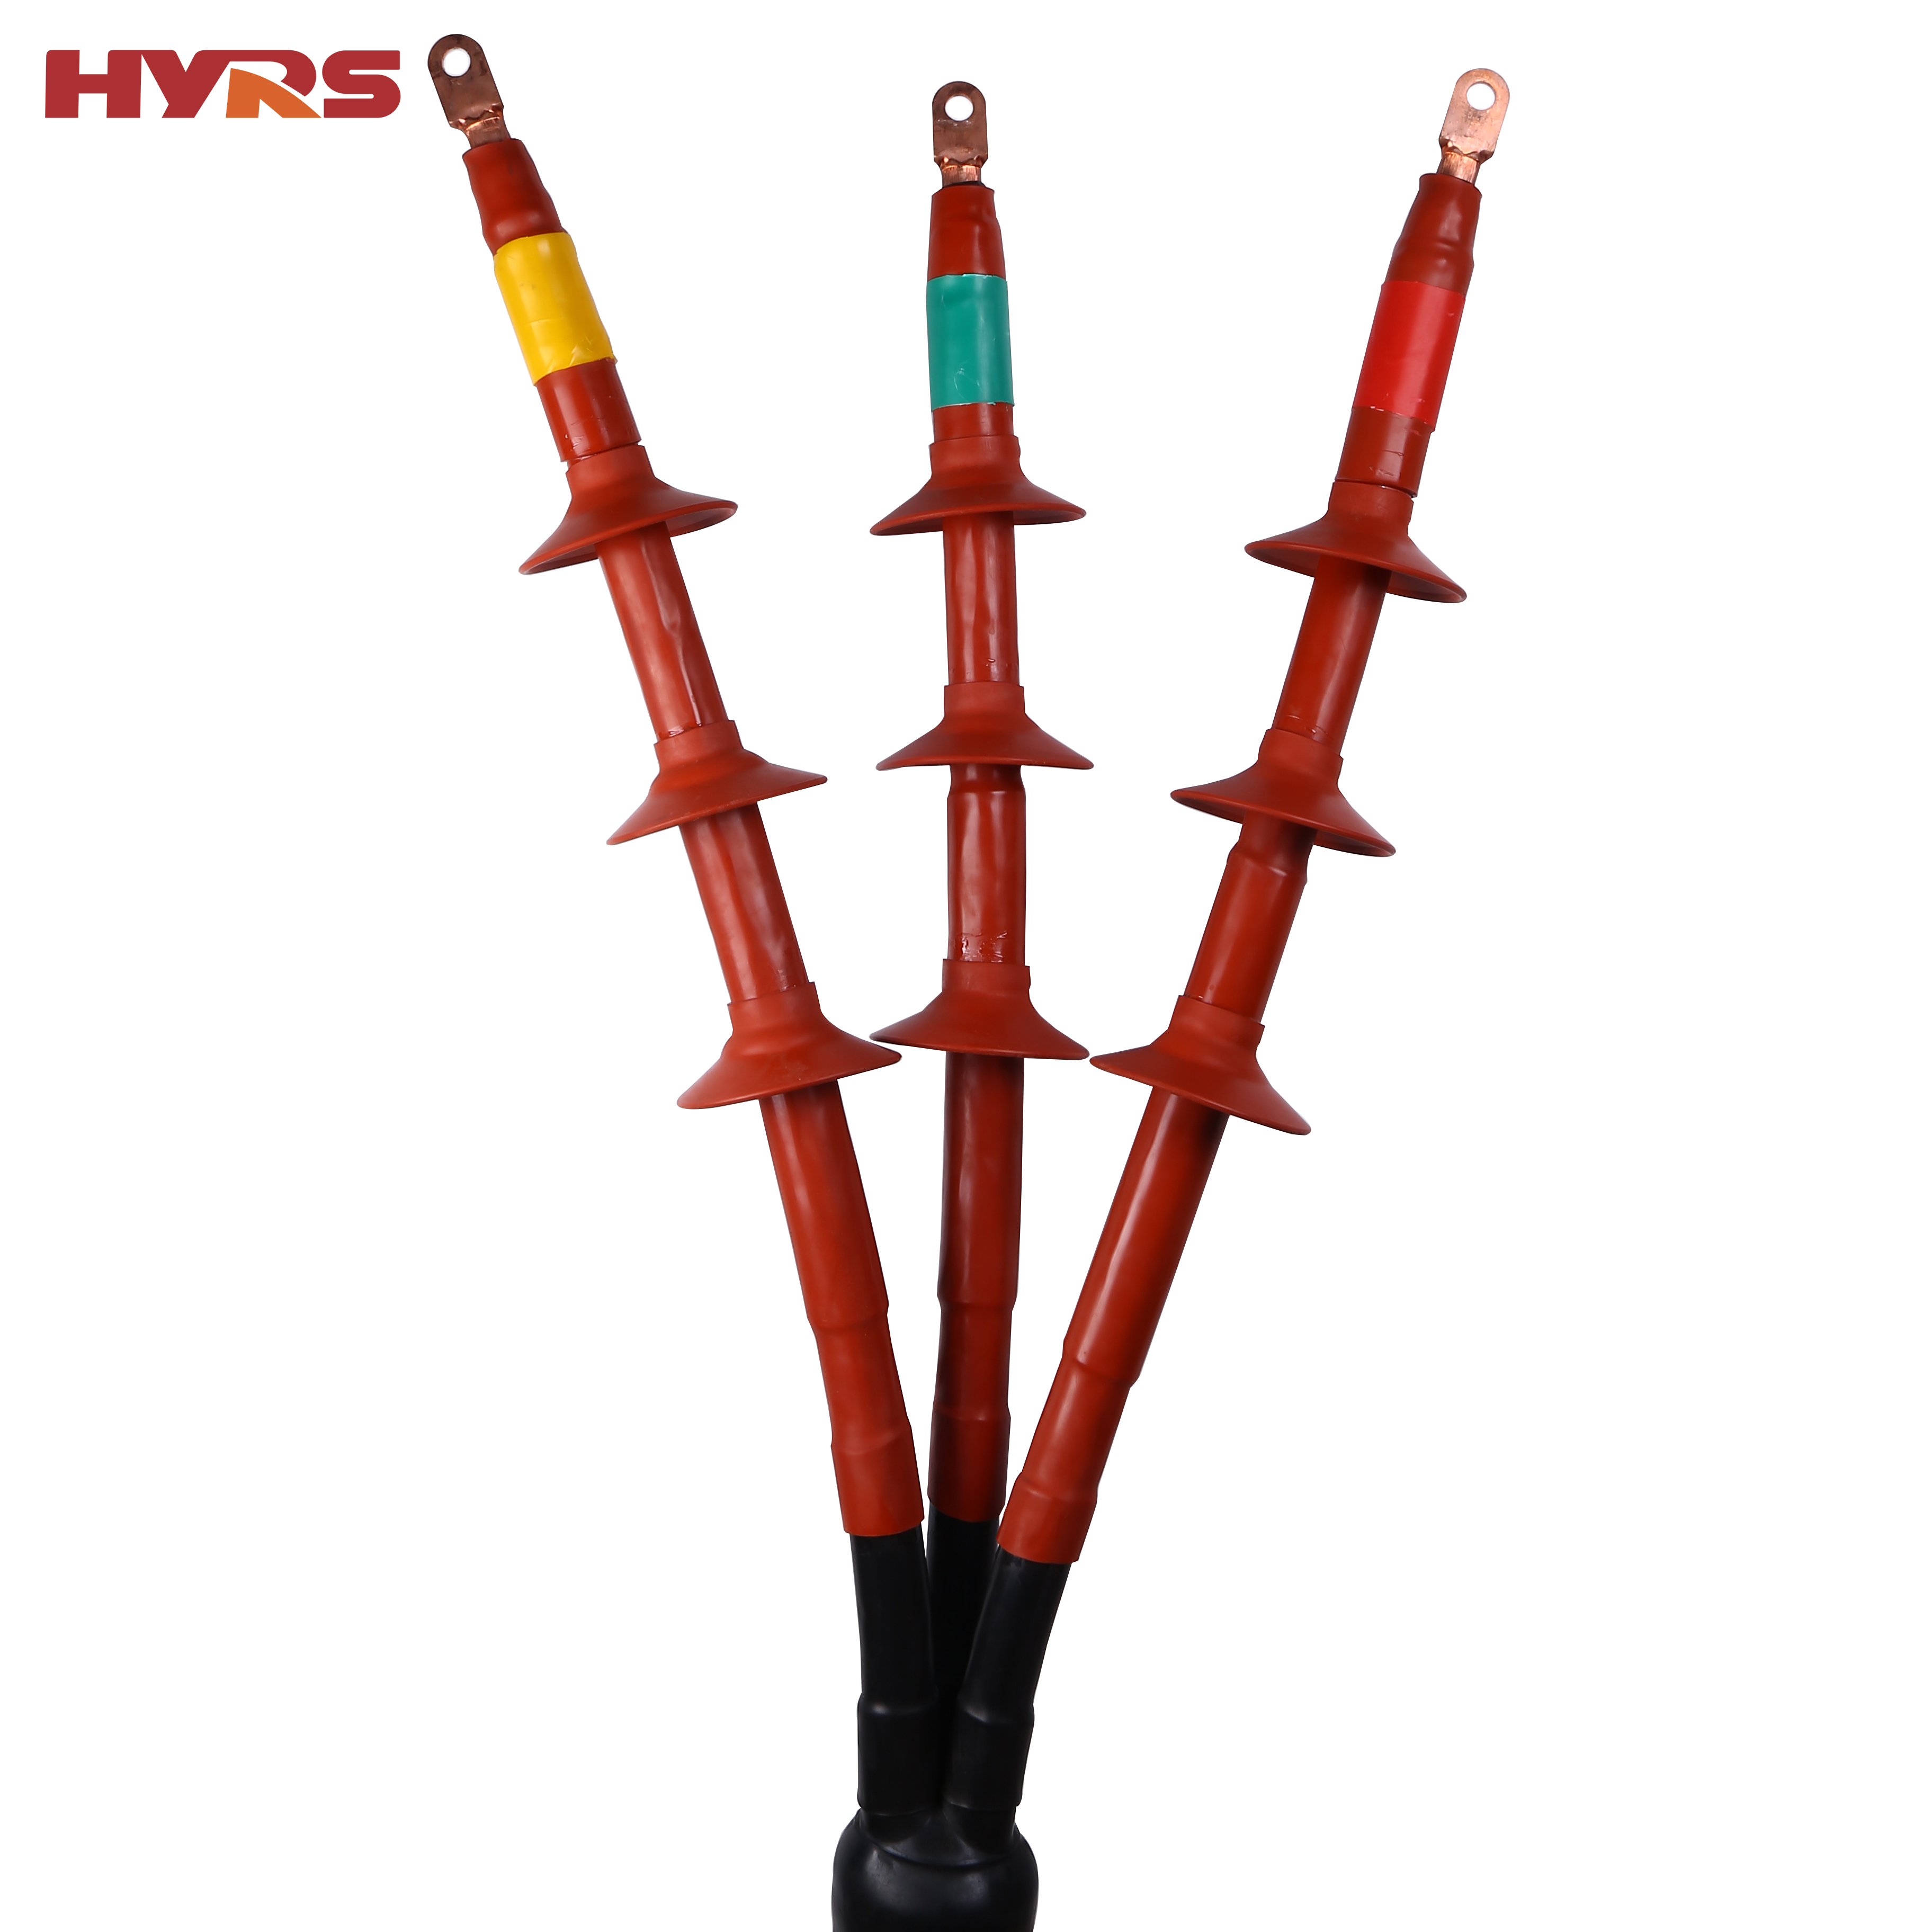
Check the installation site - Prior to installation, check that the installation site for the cable termination kit is suitable and complies with applicable codes and standards.
Prepare the cable - Clean and prepare the exposed cable end by removing the outer jacket, cleaning the insulation surface, and roughening it with abrasive paper.
Install the breakouts - Install the breakout components that come with the kit to the power cable, if applicable.
Install the tube and stress control cone - Slide the heat shrinkable tube and stress control cone onto the prepared cable end.
Install the cable lug - Slip the cable lug over the prepared cable end and position it correctly.
Install the stress cone - Slide the stress cone over the cable lug, making sure that it is centered properly.
Apply heat - Use a heat gun to heat the cable termination components evenly. The heat will cause the components to shrink, creating a tight and secure seal around the cable.
Inspect - After the termination installation is complete, inspect the installation to ensure that all components are properly installed, that the cable seals are tight, and that the cable is re-jacketed, as required.
It's important to follow the specific instructions provided with the 33kV heat shrinkable termination kit and use proper equipment, such as a heat gun, to ensure safety and optimal performance. Please note that the steps provided are meant to be a general overview and may not be applicable to all situations.
Please contact our sale staff for the Installation details of 33kV heat shrinkable termination kit.

 English
  Español
  Português
  русский
  Français
  日本語
日本語  Deutsch
  tiếng Việt
  Italiano
  Nederlands
  ภาษาไทย
  Polski
  한국어
한국어  Svenska
  magyar
  Malay
Malay  বাংলা ভাষার
  Dansk
Dansk  Suomi
Suomi  हिन्दी
  Pilipino
  Türkçe
  Gaeilge
  العربية
  Indonesia
  Norsk
Norsk  تمل
تمل  český
český  ελληνικά
  український
  Javanese
  فارسی
فارسی  தமிழ்
தமிழ்  తెలుగు
  नेपाली
  Burmese
  български
  ລາວ
ລາວ  Latine
  Қазақша
  Euskal
  Azərbaycan
  Slovenský jazyk
  Македонски
  Lietuvos
  Eesti Keel
  Română
  Slovenski
  मराठी
मराठी  Srpski језик